Constructing a fence may seem hard. But, with the right support and materials, you can do it! This article will give step-by-step instructions.
- First, decide why you need the fence. Is it for privacy or to show the boundaries of your land? After deciding, pick the right type of material: wood, vinyl, chain-link, or aluminum.
- Second, prepare the tools and supplies. These could include posts, panels, concrete mix, nails, screws, a saw, and a level. Having them ready will make the installation easier.
- Third, mark the area where the fence will go. Use stakes and string for straight lines. This will help you dig holes for the posts.
- Fourth, dig the holes for the posts. Make sure they are deep enough for stability. Usually, one-third of the post length is enough. Use a post-hole digger or shovel.
- Fifth, put the posts in the holes. Start with corner posts and fix them with concrete or gravel. As you move, use a level tool for vertical and horizontal alignment.
- Sixth, attach the panels or pickets to the posts. Align them properly and evenly. Be careful not to break any piece.
- Finally, reinforce the fence for strength and durability. This could mean adding braces or crossbars. Regular maintenance like painting or staining the wood may be needed too.
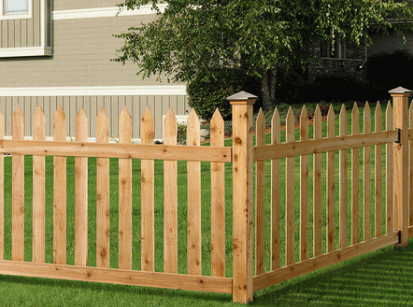
Choosing The Fence Material
Choosing the right material for your fence is key to its long life and usefulness. Various materials have varying levels of strength, upkeep needs, and looks. To help you decide, check out some popular options and their characteristics.
Wood: High durability. Needs periodic sealing. Classic look.
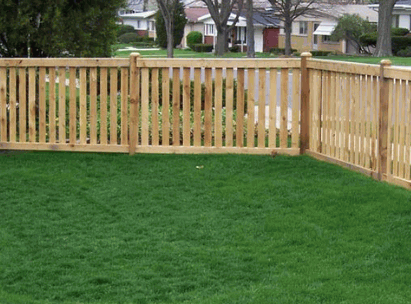
Aluminum: Moderate durability. Low upkeep. Modern look.
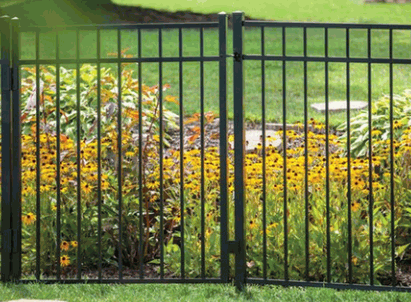
Steel: High durability. Low upkeep. Strong look.
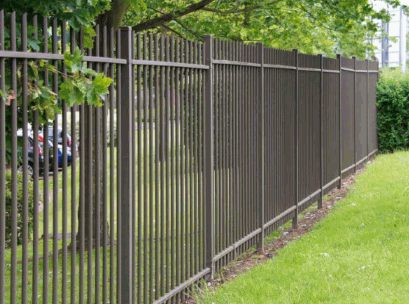
Remember, selecting the correct fence material is essential for good performance and style. Consider factors such as strength, maintenance needs, and desired look to ensure you make the right decision for your fence project.
Checking Local Regulations
Do some research first! Check your city or county’s regulations for fence height, material restrictions, and setback requirements. You may need permits or approvals from local authorities.
Chat with your neighbors about your plans, to align with their preferences and property boundaries. Note: some municipalities may have rules for fences near easements or public property. Double-check with them, to avoid legal issues.
Also, Homeowners’ Associations may have additional guidelines in some areas – be sure to follow them when building a fence on your property!
Gathering The Necessary Tools And Materials
To successfully complete the task of setting up a simple fence, it is essential to gather all the required tools and materials beforehand. This ensures a smooth and efficient process while avoiding unnecessary delays. Here’s a step-by-step guide to help you gather everything you need:
- Measure the area: Begin by measuring the perimeter where the fence will be installed. This will determine the length of the fence panels and number of posts required.
- Choose the right materials: Depending on your preference and budget, select the appropriate materials for your fence. Options may include wood, metal, or vinyl. Consider factors like durability, maintenance, and aesthetic appeal.
- Purchase necessary items: Once you’ve decided on the type of fence and materials, make a list of all the required items such as fence panels, posts, concrete, screws, nails, and any additional hardware. Visit local home improvement stores or online retailers to purchase these items.
- Gather tools: Check your toolbox to ensure you have all the necessary tools for the installation. Common tools required include a tape measure, spirit level, screwdriver, power drill, saw, wrench, and hammer.
- Safety equipment: Prioritize safety by acquiring protective gear such as gloves, safety goggles, and ear protection. These will help prevent injuries during the installation process.
- Arrange delivery or transportation: If the materials and tools are not readily available at your location, make arrangements for their delivery or organize transportation to ensure everything is on-site when needed.
Remember, attention to detail while gathering the necessary tools and materials is crucial in ensuring a successful fence installation. By following these steps, you can prepare in advance and minimize any potential setbacks.
Additionally, it’s important to note that choosing the right materials and tools will largely depend on the specific requirements of your fence project, the type of terrain, and local regulations.
Historically, the process of gathering tools and materials for constructing a fence has been essential since the concept of fences itself emerged. From the early days of utilizing natural materials such as wood, stone, or even living plants, to the introduction of more modern materials like metal and vinyl, the necessity for gathering the appropriate tools and materials has remained constant. This practice ensures the durability and functionality of the fence, providing security and privacy for countless individuals throughout history.
Get ready to wrestle with your inner DIY demons as you wield these tools and attempt to build a fence that will both keep your nosy neighbors out and your inner psycho in.
Tools Required
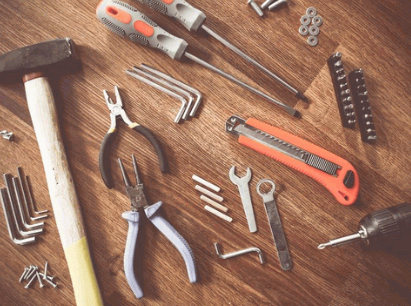
It’s essential to have the correct tools for any project. Here are five of the must-haves:
- A reliable set of screwdrivers.
- A sturdy pair of pliers.
- A measuring tape.
- An adjustable wrench.
- A power drill.
Remember to check your project’s needs.
One tool that people often forget about is a stud finder. It helps to discover wooden studs behind walls, making it easier to hang heavier objects.
Surprisingly, the history of tools goes back thousands of years. Historians have found primitive versions of hammers, saws, and drills made of stone, antler, or bone.
These ancient tools paved the way for the modern ones.
By having all the right tools, you can start a project safely and successfully. Remember to use protective gear and each tool properly. Now let’s move on to the next heading.
Materials Required
Gathering the right tools and materials is super important. Here’s a list of the basics you’ll need:
- Tools – measuring tape, screwdrivers, pliers, and hammers.
- Safety stuff – goggles, gloves, and mask (if needed).
- Construction materials – lumber, nails, screws, and adhesive.
- Finishing materials – paints, varnishes, or stains.
- Electrical supplies – wires, switches, and outlets.
- Misc items – sandpaper grades and brushes.
Also, make sure you have any specific materials that your project requires. Check your plans carefully and be organized when preparing.
Having the right tools and materials will help you avoid delays or interruptions. Get it all ready before getting started so you can enjoy the satisfaction of completing your project without any hiccups!
Measuring And Marking The Fence Line
Measuring and marking the fence line is an essential step when putting up a simple fence. It involves determining the exact boundaries of where the fence will be installed and marking those points for accurate placement. To guide you through this process, here is a 3-step guide:
- Assess the property: Begin by surveying the area where the fence will be constructed. Take note of any existing boundary lines, property corners, or obstructions that may affect the fence’s placement. This will help you determine the best route for the fence and ensure it remains within your property boundaries.
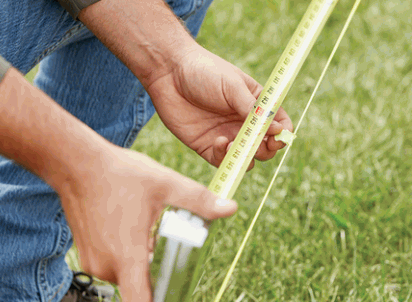
- Measure and mark the corners: Using a measuring tape or a surveying tool, accurately measure the distance between each corner of the fence line. Start at one corner and proceed to the next, ensuring the measurements are precise. Once measured, mark each corner point using stakes or spray paint to clearly indicate where the fence posts will be installed.
- Establish the fence line: After marking the corners, connect the dots to create a straight line between each point. This will serve as the guide for installing the fence posts along the entire fence line. You can use string or a taut line to ensure the alignment is straight and consistent.
Remember to double-check your measurements and adjust as necessary before proceeding with the actual fence installation. It is also recommended to consult any local regulations or obtain necessary permits before constructing the fence.
When measuring and marking the fence line, be mindful of factors like property boundaries, obstructions, and alignment to ensure a precise and properly placed fence. Avoid relying solely on visual estimates, as accurate measurements are crucial for a successful fence installation.
The history of measuring and marking fence lines dates back centuries, with humans using various methods to establish boundaries and enclosures. From ancient civilizations marking land boundaries with stones to modern surveying tools, the process has evolved but remains an important aspect of fence construction.
The only way to determine the boundaries without a fuss is to let your nosy neighbors unknowingly take on the role of human fence posts.
Determining The Boundaries
A table can be used to organize and present the gathered data for boundary determination. The columns should have GPS coordinates, physical markers, and property descriptions. This makes a precise record of each point, ensuring a correct fence line.
Technological progressions have also been important for boundary determination. Tools like satellite images and mapping software make it simpler to mark exact spots along the fence.
In the past, land disputes were common because of inaccurate boundary demarcations. This caused quarrels between neighbors and countries. Over time, societies made standard practices for proper lines, ensuring fair land ownership.
For boundary determination, careful thought and attention to detail is necessary. Traditional and modern techniques can give correct measurements, forming a great basis for fencing projects.
Marking The Fence Line
Marking the fence line correctly? Follow these four steps!
- Measure and map the area. Use a tape measure and stakes to mark the corners of your property.
- Connect the stakes with a string. This will act as a guide and help you stay in a straight line.
- Check for obstacles or uneven terrain. Use more stakes or markers when needed.
- Use marking paint or suitable markers to indicate where posts should be placed.
These steps will result in a neat fence. Additionally, they limit any errors from incorrect measurements or deviations.
Remember:
- Double-check all measurements.
- Take soil type and climate into account.
- Make sure markings are visible and distinguishable.
By taking care of this initial stage, you can set yourself up for a smooth construction process. You’ll have a great-looking and sturdy fence in the end!
Digging The Fence Post Holes
Digging the Holes for the Fence Posts
To ensure the stability and durability of your fence, it is important to dig the holes for the fence posts correctly. Here is a step-by-step guide on how to dig the holes for your fence posts:
- Measure and mark the location of each fence post: Use a measuring tape to determine the exact placement of each post. Mark the spots with stakes or spray paint.
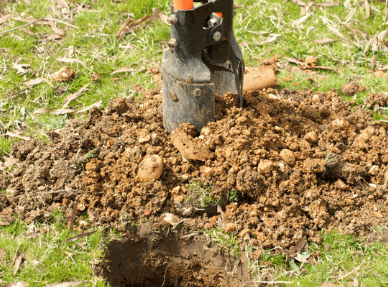
- Dig the first hole: Begin by digging the first hole for the fence post. Use a post-hole digger or a shovel to excavate the soil. The hole should be at least one-third the height of the fence post.
- Create a level base for the post: After the hole is dug, remove any debris from the bottom and ensure that the base is level. This will help provide stability to the fence post.
- Insert the fence post: Carefully place the fence post into the hole, making sure it is centered and straight. Check the level to ensure that the post is vertical and adjust if necessary.
- Secure the post and repeat the process: Fill the hole with concrete or gravel around the base of the fence post to secure it in place. Repeat the process for the remaining fence posts.
Remember, it’s essential to dig the holes accurately and ensure that the fence posts are properly secured. Taking the time to do this correctly will help prevent future issues and ensure the longevity of your fence.
Make sure to follow these steps carefully and take the necessary precautions when digging the holes for your fence posts. You don’t want to miss out on having a sturdy and long-lasting fence for your property. Get started today and enjoy the benefits of a well-built fence.
Calculating the hole spacing: Just remember, the larger the gaps, the more opportunities for nosy neighbors to see your questionable life choices.
Calculating The Hole Spacing
Take a look at this table to figure out the recommended hole spacing for different fence types:
| Fence Type | Recommended Hole Spacing |
|---|---|
| Wooden | 6-8 feet apart |
| Chain Link | 10-15 feet apart |
| Vinyl | 6-8 feet apart |
Keep in mind that these suggestions may change depending on the soil and local ordinances.
For extra strength and durability, there are a few more steps to take:
- Use a post-hole digger for better accuracy when digging.
- Use a string line to make sure the holes are in line.
Now you know what to do! Start your fence project and create a strong and beautiful boundary for your property. Have fun!
Digging The Holes
- Determine the location: Find the optimal spot by considering property lines, terrain, and any underground utilities.
- Gather the right tools: Get a shovel or digger, string line, stakes, and a measuring tape. These tools will make digging easier.
- Start digging: Mark the positions of your posts with stakes and string lines. Begin digging the holes with your chosen tool and ensure they are deep enough. Take out any rocks or debris.
- Remember: Dig the holes wider at the bottom. This adds extra stability.
- Fun Fact: Machines called post-hole augers can make the process easier and faster. They are used in agricultural settings and can be rented for residential purposes.
Installing The Fence Posts
When it comes to setting up your fence, the first step is to install the fence posts. Here is a concise 4-step guide to help you with this process:
- Choosing the Right Location: Determine where you want to place your fence posts, ensuring that they are evenly spaced and aligned.
- Digging the Holes: Using a post hole digger, carefully dig holes for each fence post. Make sure the holes are deep enough to provide stability for the posts.
- Setting the Posts: Place each fence post into its designated hole, making sure they are positioned upright and level. Backfill the holes with soil and tamp it down firmly around the posts.
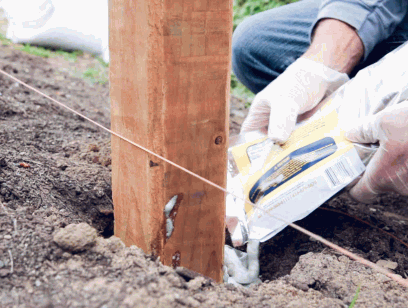
- Securing the Posts: To ensure the posts are securely in place, use concrete or gravel to fill the holes around them. This will provide additional stability and prevent the posts from shifting over time.
It is important to note that the depth and spacing of the fence posts can vary depending on the type of fence you are installing and the geographical location. Consulting a professional or referring to local building codes can help you determine the specific requirements for your project. For further guidance on setting up your fence, such as attaching the fence panels and adding finishing touches, refer to the subsequent section. Enhance the security and aesthetics of your property by following these simple steps. Don’t miss out on the opportunity to improve your property’s boundaries and add privacy. Start installing your fence posts today and create a safe and inviting outdoor space.
Inserting the posts into the holes: We make holes big enough for posts to fit in and dreams of nosey neighbors to fall into.
Inserting The Posts Into The Holes
- Measure and mark the spots for your fence posts.
- Use a post-hole digger or an auger to create holes that are deep enough for the posts.
- Before adding them to the holes, remove any debris or sharp edges and coat the posts with a preservative.
- Lower each post into its hole until it reaches the right depth.
- Use a spirit level to make sure it’s in a vertical position.
- Once all posts are inserted, secure them with concrete or gravel.
- Consider soil composition and weather when deciding how deep to dig.
- You can also reinforce wooden fence posts with metal spikes for added strength.
- These tips will help you insert your posts and make your fencing project last.
Ensuring Proper Alignment And Stability
Installing a fence? Make sure it’s lined up and stable with these simple steps!
- Measure the area.
- Dig holes for posts, deep enough to provide stability.
- Place the posts in the holes, and make sure they’re upright and level.
- Fill each hole with concrete, securing the posts.
- Let the concrete set completely.
- Then attach the fence panels or boards, being sure they align and provide a secure barrier.
But there’s more to think about too! Soil composition, and weather conditions – all affect stability. A friend of mine ran into trouble when it rained heavily during the concrete-setting process. Excess water made it tough for concrete to set properly. But they reinforced the weakened areas and got a sturdy fence.
If you line up and secure your fence properly, you’ll have a reliable barrier that looks great and works well.
Attaching The Rails And Panels
When it comes to attaching the rails and panels for your fence, there are a few steps you should follow. Here is a simple 3-step guide to help you with the process:
- Position the Rails: Start by positioning the rails along the length of the fence, ensuring they are evenly spaced and level. Use a measuring tape and level to assist you with this step.
- Secure the Rails: Once the rails are in position, use screws or nails to securely attach them to the fence posts. Make sure to use the appropriate size and type of fasteners for your specific fence material.
- Install the Panels: After the rails are securely attached, it’s time to install the fence panels. Lift each panel and align it with the rails, making sure it fits properly and is level. Use screws or nails to secure the panels to the rails, ensuring they are evenly spaced and aligned.
With these steps, you should be able to successfully attach the rails and panels for your fence. However, it’s important to note that each fence project may have its own unique details and requirements. It’s always a good idea to consult the manufacturer’s instructions or seek professional advice if you encounter any challenges during the installation process.
In a similar tone, here is a true story that highlights the importance of properly attaching fence rails and panels:
It’s like a blind date – connecting the rails to the posts requires some careful alignment and a dash of hope for a lasting bond.
Connecting The Rails To The Posts
- Attach the bottom rail. Align pre-drilled holes. Fasten together with either screws or nails.
- Check the level with a spirit level. Adjust if not horizontal.
- Position intermediate rails between the top and bottom. Secure to both ends with screws or nails. Make sure they’re aligned and parallel to the bottom rail.
- Align and attach the top rail. Again, check the level with a spirit level and adjust if needed.
- Double-check that all rails are secure. Tighten any loose connections if necessary.
- Repeat for additional panels. Ensure consistency and accuracy.
For different materials, specific techniques/hardware might be needed. Refer to product manuals or seek professional advice for unfamiliar materials.
Installing The Fence Panels
- Measuring and Marking: Measure the width of your fence panel. Mark the same distance on the fence posts. This will help align the panels correctly.
- Attaching Rails: Screw or nail the bottom rail to the posts. Make sure it is level and secure. Do this for all rails, with equal spacing between them.
- Installing Panels: Lift and place each panel between the rails. Ensure it aligns with the marked distance on the posts. Secure the panels using screws or nails.
- Finishing Touches: Check the alignment of all panels. Use a level to make sure they are straight. Add any additional decorative elements.
- Before installation, check local building codes and regulations for compliance.
Securing The Fence Panels
Securing the Fence Panels:
To secure the fence panels professionally, follow these 3 steps:
- First, position the panel against the posts, ensuring it is level and plumb.
- Next, attach the panel to the posts using galvanized screws or nails.
- Finally, reinforce the panel by adding diagonal braces for extra stability.
Additionally, it is important to check the alignment and spacing of the panels to ensure a uniform and secure fencing structure.
A true fact about fence installation is that using pressure-treated wood can significantly extend the lifespan of the fence panels.
Now you can add brackets and screws to your fence, giving it a stability that your relationships might be lacking.
Adding Brackets And Screws
- Position the brackets. Identify spots needing extra support. Place them on vertical posts, ensuring they are even and aligned. This will give panels a sturdy base.
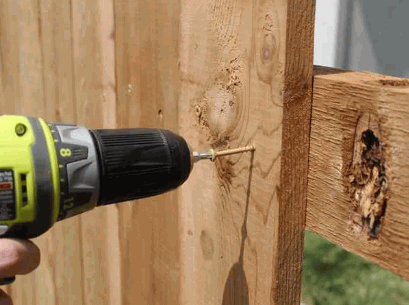
- Prepare the screws. Use rust-resistant screws for outdoor use. Select the right length. They should penetrate the bracket and post without sticking out.
- Attach the brackets. Use a screwdriver or drill. Drive screws through pre-drilled holes. Tighten them, but not too much to avoid damaging the wood or metal.
- Install the fence panels. Put each panel between two brackets. Align with vertical and horizontal elements of your fence structure. Drive screws through pre-drilled holes into brackets, fixing them in place.
Important: Choose high-quality brackets and screws compatible with fence panel material.
Pro Tip: Apply a protective coating or seal after installation to prolong the lifespan of your fence panels. This guards against moisture damage and preserves their look.
Checking For Sturdiness And Levelness
It’s important to make sure fence panels are stable and level for their long life and attractive look. To install them, follow these steps:
- Inspect the posts for any damage or instability. If they are loose or leaning, repair or replace them first.
- Use a level on the top of the first panel. Move it until it’s perfectly level.
- Secure the first panel with screws or nails. Make sure there’s enough to keep it attached to the posts.
- Do the same for the second panel. Place the level on top and adjust until it’s level with both nearby panels.
- Secure it in the same way as the first. Ensure it’s aligned with both nearby panels.
- Keep repeating this process for all the panels. Make sure each one is level and secure before moving on.
Extra Advice: To increase stability, consider adding support brackets or braces to your fence panels at regular intervals. This gives extra strength and prevents sagging or warping.
Adding Finishing Touches
To complete the fence installation, follow these five steps:
- Gate Installation: Attach the gate to the fence using sturdy hinges, ensuring it opens and closes smoothly.
- Finishing the Top: Add decorative post caps or finials to enhance the fence’s appearance and provide extra protection against weathering.
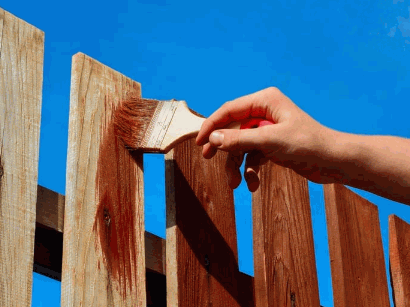
- Add a Stain or Paint: Apply a weather-resistant stain or paint to not only enhance the fence’s aesthetic appeal but also protect it from moisture and UV damage.
- Install Lattice or Trellis: Attach lattice or trellis panels to certain sections of the fence to add privacy or support climbing plants for a charming touch.
- Landscape Around the Fence: Create a clean and polished look by adding landscaping elements, such as flowers, shrubs, or gravel, around the fence perimeter.
Remember, attention to these details will ensure that your fence not only serves its purpose but also adds to the overall aesthetic appeal of your property.
As a historical note, the concept of adding finishing touches to fences has been around for centuries. In ancient times, ornamental elements like decorative ironwork or carved wooden panels were used to signify status and add beauty to fences. This tradition has evolved over time, with modern materials and techniques offering a wide range of options to create a personalized and stylish fence.
Transform your plain fence into a work of art with a splash of paint or stain, because even your boundary deserves a touch of fabulousness!
Painting Or Staining The Fence
- Choose paint or stain that fits the material of your fence. They vary depending on the type of wood or metal.
- Prep the surface by cleaning and sanding. Remove any loose paint or trash for a smooth finish.
- Apply primer prior to painting for better adhesion and longer-lasting results, especially if it’s never been painted before.
- Use thin coats instead of one thick layer to avoid drips and ensure better coverage.
- Go for a stain that matches the wood’s natural color. You can pick from transparent to solid color options.
- Protect your fence with a sealant after painting or staining. This will help it last longer.
- Remember to take care of your fence by regularly cleaning and touching up faded or chipped areas.
- Give your fence an amazing look – choose paint or stain and complete the job!
Discover: Can Fence Paint Be Used On Garden Furniture
Adding Decorative Elements
Decorating your space is key for a visually appealing environment. Creative additions can truly take a room to the next level – let’s explore!
Wall art brings color & personality – choose pieces that resonate with your style.
Plants add a touch of nature – small or large, they create an inviting atmosphere.
Lighting sets the mood – pendant lights, floor lamps, or string lights.
Decorative pillows add texture, pattern, & pops of color.
Display books & magazines – an instant stylish look.
Add personal mementos – these unique items tell your story.
Studies show well-decorated spaces can boost mood & productivity – so go ahead & add those finishing touches!

Conclusion
You have now installed a simple fence on your property. Plan the layout and select materials carefully for a durable, secure, and aesthetically pleasing fence.
Maintenance is key! Check for loose boards or broken panels regularly. Also, use a protective sealant or stain to protect against moisture and UV rays.
Before starting any fencing project, double-check with local regulations and get the necessary permits. This stops any legal problems in the future.
For extra privacy and looks, add trellises or climbing plants. Follow these guidelines and you’ll have a functional fence that meets your needs.
Always keep safety in mind during installation and take the time to maintain your fence. Now enjoy your fence for years to come!
