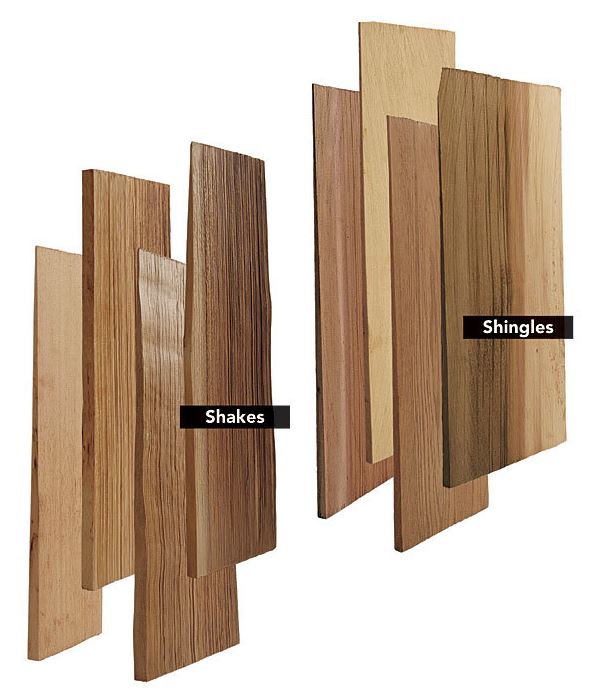
Although both are used for cedar roofing, on sheds and houses alike, shakes and shingles are sometimes incorrectly referred to as the same thing.
There are in fact similarities and differences between the two, but I can’t stress enough how important it is to refer to them differently since they may do the same job but the way they do it aesthetically and practically different.
But before we get into the main discussion of this article, shake vs shingle, it is important to know what they individually are, then it makes comparing the two a lot easier.

What are Cedar Shakes?
Split by the hand from lumber logs, doing so with special crafting tools. Cedar shakes are a type of wood roofing that has been split on both or one side – taken from the Cedar Shake and Shingle Bureau guidelines.
The most popular of the two when it comes to roofing materials, shakes are usually crafted into a preferred shape by hand although some can and are manufactured by power equipment – this is more common on a mass produced level rather than an individual shed or house project.
What are Roof Shingles?
Typically machine cut from a block of wood, the main characteristic of the waska cedar shingles is that they have been cut using a saw. The end of the cut, usually referred to as the butt is always thinner than its shakes counterpart, making the shingle thickness very thin in comparison.
Shake Vs Shingles: Similarities
Whether it’s a shake or shingles, each piece comes from a certain type of tree. Now, this type of tree depends on what the designer is interested in, typically though they are from a Cedar tree due to its neutral finish and easy accessibility.
Shingles and shakes are durable all year round, growing to an age which any homeowner would be pleased with – for at least 50 years if properly maintained!
With further treatment, they can also become somewhat fire resistant and are able to be preventable from natural decay.
Difference Between Shake and Shingle
The difference between shakes and shingles usually happens during the manufacturing stage, since in essence, they can come from the same wood source, making them at one point, the same thing.
Shake shingles can also be used as siding. When it comes to the cedar shake siding installation process, you will need to use the proper underlayment.
To get into the difference in their creation process, let’s talk about them separately:
Making Cedar Shakes
For this, we’ll use Cedar shakes as an example, simply because it is the most common type of wood used and because each design process is similar regardless of the wood in question.
The shake is first hand-split from a log and shaped into a block, as best as possible. These shake blocks are then split up by hand or with some form of pressure, usually from a special tool or with a hydraulic press.
If the person splits the block without flipping it over, then there will be a uniform thickness, which is less than ideal for shakes. But if the block is flipped over during the process after removing the blanks form each side (blanks are one inch slates from either side after the block of wood has been split), then you have yourself a shake.
Making Cedar Shingles
Again I’m going to use Cedar shingles as an example here, again, no need to read too much into it other than the fact it’s the most common wood used in today’s market – remember, all manufacturers process are virtually the same no matter the wood used.
A circular saw cuts a shingle from a block of cedar (wood). Each passing swipe of the saw creates a cut, all of the same thickness. Another type of saw is then used to trim the edges of each shingle piece, removing any irregularities ensuring that each piece is of the same measurements, give or take a few unique cuts and curves here and there.
Let’s Recap…
So, after comparing shingles and shakes’ manufacturing process, I hope it’s a little more clear on how different they are. But if not, lets recap:
- Shakes are thicker than Shingles.
- Shakes have more cross graining.
- Shingles are smoother.
Ultimately, they are similar in many ways, but in terms of design, they are a little different. Making them a great choice for your roofing regardless of which one you use. Although if you’re looking for a more specific design, I would carefully consider your choice, not forgetting the sort of wood you wish for them to be made from.
Insurance companies can price differently depending on the roof type so get some housing insurance quotes first. If you are getting insurance to pay for a roof replacement then make sure to get it properly inspected asap before more damage occurs or they might decline the claim.
How to Install Cedar Shingles/Shakes
Since we’ve gone over the differences between shingles and shakes, it would be more than appropriate to let you in on how you can add them to your very own building project.
Obviously ever roof is different, sheds, garages, and houses all come with unique roofs and sizes, so take below what you see with a pinch of salt.
With that being said, it still serves as a great guideline for when you come to install your own shingles/shakes to your project.
Here is the instructions step by step to help you install cedar shakes/shingles (or any type for that matter):
Step 1
Cover the surface with felt, typically this would be a roof. Use a hammer and nails (preferably a hammer stapler) to fasten the materials down, stapling it in place every 10 or inches so along.
Step 2
Position the first shingles or shakes so it hangs over the edge of the roof slightly, around about ½ an inch depending on the look you’re going for. Secure it to the roof once you’re happy with the position by placing two nails in the top edge of the wood material.
Step 3
Making sure you leave enough space, around about ⅛ inch between each shingle (which allows it to contract and expand) place the second shingle or shake the same amount overhanging the roof as the first. And again attach the material with two nails at the top edge.
Step 4
Using the same method laid out for you in the previous steps, add the rest of the shingles or shakes in the first row.
Step 5
Now, directly add another layer to the first row. This allows any rain or snow to have a larger runoff point where runoffs can collect, which also gives height and more decorative depth to the roof.
Step 6
This is where it gets a little more personal. You now know how to place shingles and shakes on a roof but from this point forward you’re on your own. This is because, you may want to follow a certain style, one you’ve seen from photos or you’re just going to wing it.
As long as you’ve followed the steps up until this point, you have all the knowledge to go out and start work on your own roof. Just remember to plan ahead, ensuring you have enough wood shakes and shingles to finish the job and that you follow a consistent pattern.
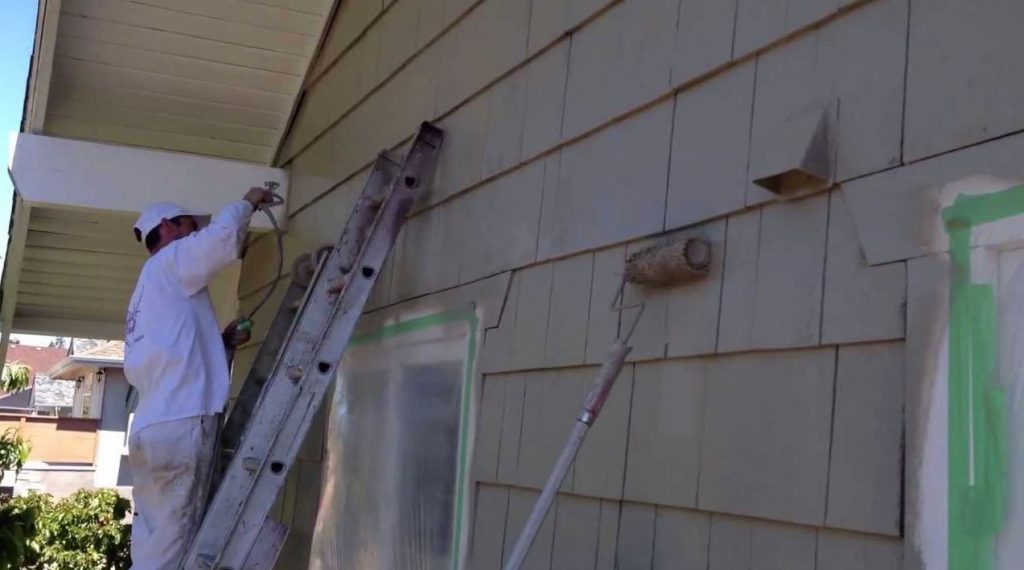
Painting Wood Shingles/Shakes
Many modern-day shingles and shakes are now stained rather than painted, although one downside of this is that stained wood is a lot more maintenance-intensive. Typically stained wood will only last around 1-4 years due to natural aging and uncontrollable weather conditions.
Just like painting your walls, ceilings, and furniture to keep up with the latest interior design trends, you have to prepare your space before you go ahead and add your favourite colours. The steps ahead to prepare and paint your shingles and shakes apply across both types of wooden finish and it won’t matter too much if they’re newly installed or have had previous decoration on them (from painting and staining)

Step 1
Just like you would do inside the home, you’re going to want to cover up anything that you don’t want o get covered in paint, whether that’s your beautiful garden shrubbery or a nearby pavement.
Step 2
The best way to prepare your shakes and shingles before you paint them is by sanding off any irregularities using a sander, preferably a hand sander rather than a bit of sandpaper for efficiency.
One thing I’d recommend however does not sand them to perfection, because you’ll take away their natural look which is probably half the reason you’re using them in the first place.
So sand enough for them to be fine for painting but not too much so that they look like vinyl.
Step 3
You’re going to want to wash your shakes and shingles before you paint them, to get rid of any grime, stains or just general debris. The best way to do this is by using a pressure washer, mixing the water with some detergent to properly get rid of the stains. Make sure to wash the surface down with some plain water beforehand to properly rinse off any leftover detergent or dirt.
Great, if you’ve followed these Steps you’re all set to add your own paint. Same as indoor painting, we recommend always adding 2 or more coats to ensure the fluid runs into the wood.
Conclusion
Although there are differences between Wood Shakes and Wood Shingles, from the manufacturing process to the final appearance, they can be used in similar ways on similar projects and even be painted on in the same way.
Choosing from them shouldn’t be too difficult, I’d say go for either of them unless you’ve got a style in mind.
